Do you see any challenges? - Try to reproduce the situation (stash) 2. Git provides the option to edit prior commits using an interactive rebase, such as the **git rebase -i**. How would that affect the following commits? git questions: understand linearized git history displayed on GitHub / reading gitk DAG Illustrate on the whiteboard: new/alternative commit with the same parent, all following commits are applied on top of the new commit - commit SHAs change! - Refer to the slide on commits - Maybe even illustrate
# Remotes and branches - Most remote operations, including pull, push, and pull requests refer to branches. - In some cases, **branches must be selected explicitly**: pull requests or pulling new branches. - In other cases, Git automatically selects branches, i.e., it remembers the typical branch to pull or push. 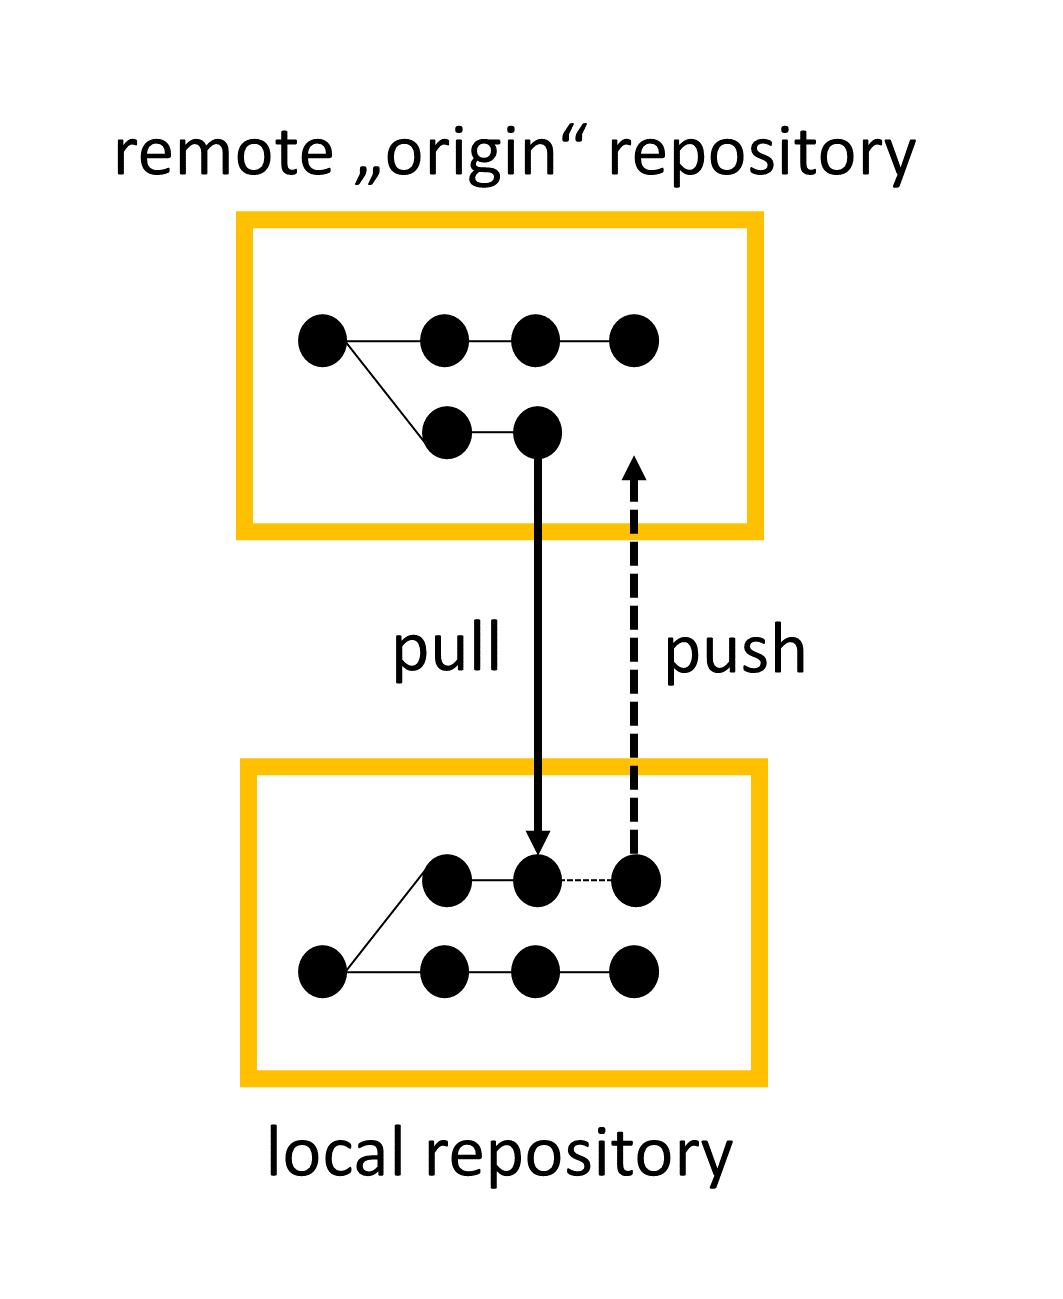 --- # Transfer challenges II - Once a pull request has been opened, how can new changes (commits) be added? - Assume that you discovered a typo in a very old commit. One option would be to run an interactive rebase and fix the typo. Why could such cases of "rewriting history" be problematic in collaborative settings? - When pulling changes, there are two strategies to handle diverging branches: ``--merge`` or ``--rebase``. How do the results differ between these strategies? Note: pull requests are just pointers (like branches/HEAD, they move with the branch) pull --rebase (we discussed interactive rebase before) - GitHub offers the possibility to edit files directly. Are all three Git areas available in this setting?